Model Colors
To create models with a variable color that can be applied in-game, we have made this guide to help you understand how to use these colors.
For this tutorial we assume you already know how to create a resource pack and add custom models to it.
In this guide we only cover applying custom colors using custom_model_data.
Using this method, we can apply multiple colors to a single model from within our codebase.
For more types see: https://minecraft.wiki/w/Items_model_definition (these are not covered in this guide).
Preparation
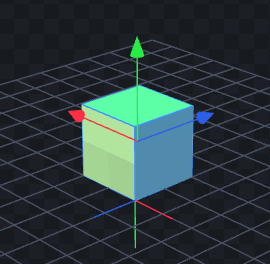
In this guide we use a small 2x2 cube to demonstrate how to use colors in your models.
We created a simple texture and auto applied the UV's to the model.
Of course this guide can be applied to any model.
1. Base color
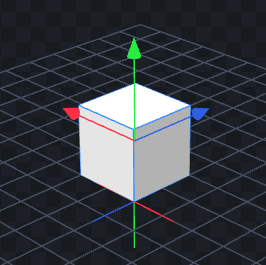
The color that will be applied in-game will blend with the color already on the model.
Therefore, you should make the texture of your model as white as possible.
In our example we have made the cube completely white.
The darker the texture, the darker the final color will be.
2. Setting the tint index
In order for the game to know which parts of the model should be colored, we can set a so called tintindex.
For every face that needs another color we set a different tintindex value starting at 0.
In our example we give every face a different tintindex value which results in the following using BlockBench:
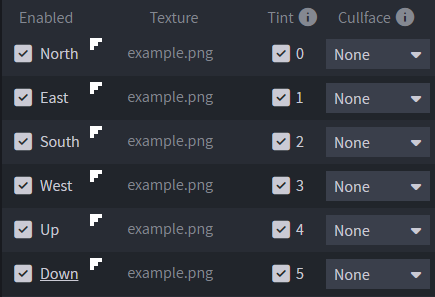
Note that every UV face has Tint checked with a different value starting from 0.
You can access the Tint setting in Blockbench as follows:
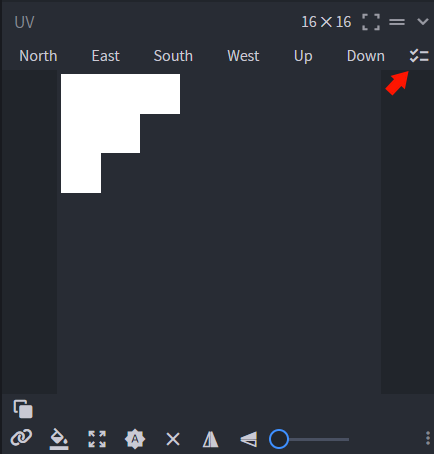
When having multiple elements and/or multiple texture files in your model, make sure that the tintindex values are unique across the entire model when they require a different color.
When two faces in the model have the same tintindex value, they will be colored the same in-game.
3. Export the model
We can now export the model from Blockbench as a Minecraft Java Block/Item model.
As we can see in our exported example, each face has a different "tintindex" value.
{
    "format_version": "1.21.8",
    "texture_size": [16, 16],
    "textures": {
        "1": "minecraft:demo/demo"
    },
    "elements": [
    	{
    		"from": [7, 0, 7],
    		"to": [9, 2, 9],
    		"rotation": {"angle": 0, "axis": "y", "origin": [7, 0, 7]},
    		"faces": {
    			"north": {"uv": [2, 0, 4, 2], "texture": "#0", "tintindex": 0},
    			"east": {"uv": [0, 4, 2, 6], "texture": "#0", "tintindex": 1},
    			"south": {"uv": [4, 0, 6, 2], "texture": "#0", "tintindex": 2},
    			"west": {"uv": [0, 0, 2, 2], "texture": "#0", "tintindex": 3},
    			"up": {"uv": [2, 4, 0, 2], "texture": "#0", "tintindex": 4},
    			"down": {"uv": [4, 2, 2, 4], "texture": "#0", "tintindex": 5},
    		}
    	}
    ],
    "display": {}
}
4. Adding the model to an item
We now want to add our model to an item so we can use it in-game.
In our example we add our item to a leather chestplate for this example on CustomModelData floats 1.
But you are free to use any item with any custom additional custom model data you want.
Take note of the "tints" section in the final model file below.
Here we define the colors that will be applied to the model.
The order of the colors in the "tints" section corresponds to the "tintindex" values we set in the model.
So the first color in the tints section will be applied to all faces with "tintindex": 0, the second color to all faces with "tintindex": 1, and so on.
Counting starts at 0 so the first element of "tints" is related to "tintindex": 0.
{
    "model": {
        "type": "range_dispatch",
        "property": "custom_model_data",
        "fallback": {
            "type": "model",
            "model": "minecraft:item/leather_chestplate"
        },
        "entries": [
            {
                "threshold": 1,
                "model": {
                    "type": "model",
                    "model": "minesociety:example/cube",
                    "tints": [
                        {
                            "type": "minecraft:custom_model_data",
                            "index": 0,
                            "default": [1.0, 1.0, 1.0]
                        },
                        {
                            "type": "minecraft:custom_model_data",
                            "index": 1,
                            "default": [1.0, 1.0, 1.0]
                        },
                        {
                            "type": "minecraft:custom_model_data",
                            "index": 2,
                            "default": [1.0, 1.0, 1.0]
                        },
                        {
                            "type": "minecraft:custom_model_data",
                            "index": 3,
                            "default": [1.0, 1.0, 1.0]
                        },
                        {
                            "type": "minecraft:custom_model_data",
                            "index": 4,
                            "default": [1.0, 1.0, 1.0]
                        },
                        {
                            "type": "minecraft:custom_model_data",
                            "index": 5,
                            "default": [1.0, 1.0, 1.0]
                        }
                    ]
                }
            }
        ]
    }
}
Type
The type should be set to minecraft:custom_model_data.
In this guide we only cover the usage of custom_model_data as a way to apply colors.
For other types, please refer to the official Minecraft documentation: https://minecraft.wiki/w/Items_model_definition
Index
The index should just start at 0 and every next entry should be incremented by 1 so in sync with tintindex.
Although technically it's not related to the tintindex value, just keep them in sync for easier understanding.
The index will become relevant at # 5. Usage in-game where we define the colors.
Default
The default value is the color that will be applied when no CustomModelData is set on the item.
The color is defined as an RGB value with each value ranging from 0.0 to 1.0.
So RGB(255, 255, 255) would be defined as [1.0, 1.0, 1.0] and RGB(0, 0, 0) as [0.0, 0.0, 0.0].
[R ÷ 255, G ÷ 255, B ÷ 255]
5. Usage in-game
To test our model in-game with different colors, we can give ourselves the item using the /give command.
The colors in the command are defined as integer RGB values that are calculated using the formula: Red << 16 + Green << 8 + Blue.
Use the converter on https://minecraft.wiki/w/Data_component_format/custom_model_data to convert the colors.
In our example we have generated a few random colors and added them to the command below.
The part colors:[6003642, 10674612, 10674612, 3534658, 16519488, 13129917] is where we define the colors.
The first color will be applied to the tint with "index": 0 and so on.
/minecraft:give @s minecraft:leather_chestplate[custom_model_data={floats:[1],colors:[6003642, 10674612, 10674612, 3534658, 16519488, 13129917]}]

Code Example
This code snippet is relevant when you want to create items with colors from code.
This code requires the ItemBuilder of MCRP-Lib.
This code snippet shows how to create our example item from code with a few random colors applied to it.
ItemStack example = new ItemBuilder(Material.LEATHER_CHESTPLATE)
        .setDisplayName("Example Item")
        .setCustomModelData(
                CustomModelData.customModelData()
                        .addFloat(1.0f)
                        .addColor(Color.fromRGB(255, 0, 0))      // Color on index: 0
                        .addColor(Color.fromRGB(0, 255, 0))      // Color on index: 1
                        .addColor(Color.fromRGB(0, 0, 255))      // Color on index: 2
                        .addColor(Color.fromRGB(255, 0, 255))    // Color on index: 3
                        .addColor(Color.fromRGB(0, 255, 255))    // Color on index: 4
                        .addColor(Color.fromRGB(255, 255, 255))  // Color on index: 5
                        .build()
        )
        .build();
Demo Pack
Demo resource pack containing the example model and texture can be downloaded here: demo.zip